


You‘ve invested in high-quality honeycomb ceramic filters for your foundry. The metal chemistry is right. The pouring temperature is spot on. Yet castings still come back with defects—slag inclusions, porosity, or incomplete fills.
The problem often isn’t the filter itself. It’s how the filter is being used.
Honeycomb ceramic filters are remarkably effective when properly selected, installed, and handled. But they can also fail in ways that introduce new problems instead of solving old ones. Based on foundry industry experience and technical best practices, here are the seven most common problems encountered with honeycomb ceramic filters—and exactly how to fix them.
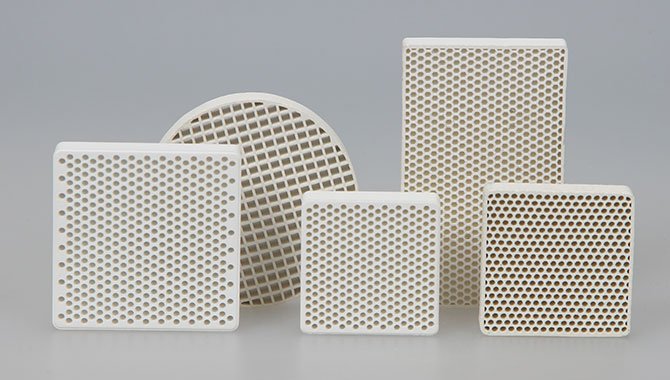
Problem 1: Thermal Shock Cracking
The Problem
You pour molten metal into the mold, and the filter cracks—sometimes audibly. In some cases, fragments break off and enter the casting, creating inclusions instead of removing them. Even if the filter doesn‘t shatter completely, micro-cracks can compromise its structural integrity and reduce filtration effectiveness.
Why It Happens
Thermal shock occurs when a room-temperature filter comes into sudden contact with molten metal at 720°C (for aluminum) or 1,390°C (for iron). The dramatic temperature difference creates thermal stress that exceeds the ceramic’s mechanical strength.
Honeycomb filters typically have thermal shock resistance up to about 800°C. While this is substantial, it‘s not unlimited—and the shock of a 1,000°C+ temperature differential in seconds is often more than the material can withstand.
How to Fix It
Preheat the filter properly. This is the single most important step in preventing thermal shock cracking.
| Parameter | Recommendation |
|---|---|
| Preheat temperature | 600–800°C (for iron casting, 900–1,000°C / 1,700–2,000°F is recommended) |
| Preheat time | Minimum 30 minutes (large filters may need 1 hour) |
| Heating rate | ≤10°C per minute—avoid rapid heating |
| Preheating method | Use a dedicated preheating furnace—never an open torch, which creates hot spots |
Critical rules to follow:
-
Complete installation within 10 minutes after preheating. The longer the filter sits, the more it cools, increasing thermal shock risk–.
-
If a pour is delayed and the filter cools down, do not reheat it rapidly. Thermal cycling can damage the structure.
-
Ensure the filter core reaches the target temperature—not just the surface. Use a pyrometer to verify temperature if available.
Problem 2: Bypass Flow (Metal Flows Around, Not Through)
The Problem
You‘ve placed a filter in the gating system, but castings still contain inclusions. The filter isn’t doing its job—because the metal isn‘t going through it.
Why It Happens
There are gaps between the filter and the mold cavity. Molten metal takes the path of least resistance, flowing around the edges of the filter rather than through the channels. The filter becomes a decorative obstruction rather than a functional filtration device.
Poor sealing is the primary cause—either the filter doesn’t fit the cavity properly, or no sealing material was used around the edges.
How to Fix It
Seal the filter edges completely.
-
Design the filter cavity correctly: The recommended gap around the filter is no more than 1–2 mm per side.
-
Use sealing material: Apply high-temperature ceramic fiber gasket paper, refractory paste, or refractory mud around the filter‘s edges before final seating.
-
Ensure even seating: The filter should sit level in the cavity. A tilted filter creates uneven gaps on one side.
The support surface flatness error should be ≤0.5 mm to ensure a proper seal. A stepped filter seat design can help reduce stress and improve sealing.
Why this matters: If even 5–10% of the metal bypasses the filter, the filtration effectiveness drops dramatically. Bypass flow also creates turbulent metal streams that can erode the filter cavity, introducing new inclusions into the metal-1.
Problem 3: Filter Breakage or Crumbling During Handling or Pouring
The Problem
The filter breaks during installation, crumbles when the mold is closed, or fractures under the impact of the metal stream. Broken fragments can enter the casting, causing inclusions and potentially scrapping the entire component-2.
Why It Happens
Ceramic filters are strong but brittle. Common causes include:
-
Rough handling during installation
-
The mold closing too tightly on the filter
-
Excessive impact force from the metal stream during pouring
-
Pre-existing damage (cracks or chips) that went unnoticed during inspection
-
Inadequate filter strength for the application
How to Fix It
Handle with care and inspect thoroughly.
-
Inspect every filter before installation: Look for cracks, chips, or corner damage. Run your gloved hand across all faces—surface breaks feel like rough edges or dents. Use strong light to check for internal cracks. Never install a damaged filter-2.
-
Design the filter seat for protection: Use a stepped filter seat to reduce bottom stress. Ensure the filter isn‘t pinched when the mold closes.
-
Control the pour: Maintain 50% of normal flow rate for the first 2–3 seconds of pouring to gently prime the filter before full flow begins. Keep the free-fall height of molten metal under control:
-
Aluminum alloy: ≤150 mm
-
Cast iron: ≤100 mm
-
Copper alloy: ≤120 mm
-
-
Choose the right filter strength: Different materials offer different compressive strengths. Mullite-based filters typically offer ≥15 MPa compressive strength—ensure your filter specification matches your application demands.
Problem 4: Clogging and Reduced Flow Rate
The Problem
Metal flow slows down during the pour, sometimes to the point of incomplete mold filling. Castings come out with cold shuts, misruns, or other flow-related defects-1.
Why It Happens
As inclusions accumulate at the channel entrances of the honeycomb filter, they build up a “cake layer” that gradually restricts flow. This is a natural part of the filtration process—but if the filter is undersized for the pour, or if the metal is exceptionally dirty, clogging can occur prematurely.
Other causes:
-
Filter pore density too high for the application
-
Filter cross-sectional area too small
-
Pouring temperature too low (metal viscosity increases)
How to Fix It
Size the filter correctly from the start.
-
Match pore density to the application:
-
100 PCSI: Large castings, high flow rate requirements
-
200 PCSI: General-purpose iron and aluminum casting
-
300 PCSI: Smaller castings requiring finer filtration
Higher pore density means finer filtration—but greater flow restriction. Don’t over-specify.
-
-
Ensure sufficient filter area: The filter‘s cross-sectional area should be large enough to handle the metal flow without becoming a choke point. For reference, a 50×50 mm honeycomb filter can handle up to 70 kg of gray iron or 40 kg of aluminum.
-
Consider flow rates: Gray iron typically flows at 3–18 kg/s through properly sized honeycomb filters. If your pour requires more than this, use a larger filter or multiple filters.
-
Pour at the correct temperature: Higher temperatures reduce metal viscosity and improve flow through the filter.
Problem 5: Poor Filtration Efficiency (Inclusions Still Get Through)
The Problem
You‘re using a honeycomb filter, but castings still show slag inclusions, oxide films, or other contamination. The filter seems to be letting particles through.
Why It Happens
Honeycomb ceramic filters work by surface sieving—they trap particles that are larger than the channel openings at the channel entrances. They do not provide the same depth filtration as foam ceramic filters.
If the inclusions are smaller than the channel openings, they‘ll pass right through. Common causes:
-
Pore density too low for the particle size you’re trying to remove
-
Filter placed too far from the casting cavity (recontamination occurs after filtration)
-
Bypass flow (see Problem 2)
-
Inclusions forming after filtration (turbulence-induced re-oxidation)
How to Fix It
Match the filter to the contamination you need to remove.
-
Choose the right pore density: If you‘re dealing with fine inclusions, you need higher pore density. The 100–300 mesh range typically removes over 90% of inclusions larger than 30μm.
-
Place the filter as close to the casting cavity as possible: This minimizes the distance metal travels after filtration, reducing the chance of recontamination or re-oxidation.
-
Understand the filtration mechanism: Honeycomb filters are best at removing large inclusions (slag, refractory fragments, large oxides). For very fine inclusions (<30μm), foam ceramic filters may be more appropriate due to their depth filtration capability.
-
Install in the runner, not the sprue: Vertical installation in the cross runner is preferred over horizontal installation at the sprue bottom. This reduces turbulence and improves filtration effectiveness.
Problem 6: Filter Shifts or Dislodges During Mold Handling
The Problem
The filter moves out of position between installation and pouring—sometimes falling out entirely. When the metal is poured, the filter isn‘t where it’s supposed to be.
Why It Happens
The filter isn‘t properly secured in the mold cavity. Common causes:
-
Filter cavity too large (excessive gap)
-
No positive retention mechanism
-
Mold handling (shaking, turning, vibration) dislodges the filter
-
The filter wasn’t fully seated during installation
How to Fix It
Secure the filter in place.
-
Design the cavity for retention: The filter should fit snugly—not so tight that it chips, but tight enough that it doesn‘t move freely. The recommended gap is no more than 1–2 mm per side.
-
Use retention methods: For two-part molds, the filter can be held between the cope and drag. For other mold types, use positioning pins, support plates, or wire to secure the filter.
-
Check before closing: After placing the filter and before closing the mold, verify that it’s fully seated and won‘t shift.
-
Apply sealing material: Refractory paste or ceramic fiber gasket not only seals against bypass flow but also helps hold the filter in position.
Problem 7: Storage and Moisture Damage
The Problem
Filters that were perfectly fine when received crack or crumble during preheating or pouring. The problem didn’t start in the foundry—it started in the storage room.
Why It Happens
Honeycomb ceramic filters are porous and can absorb moisture from the air. When a moisture-laden filter is heated rapidly, the trapped water turns to steam and expands, causing internal stress and cracking.
Other storage issues:
-
Filters stored on uneven surfaces develop stress points
-
Stacked filters chip or crack at contact points
-
Temperature fluctuations cause micro-cracking
How to Fix It
Store filters properly from day one.
-
Control humidity: Store filters in a dry environment. If possible, keep humidity below 60% RH.
-
Use proper packaging: Keep filters in their original packaging until use. Packaging is designed to protect against moisture and physical damage.
-
Handle with care: Store filters on flat, padded surfaces. Don‘t stack them haphazardly—each filter should be supported evenly.
-
Inspect before use: Even filters that have been stored properly should be inspected for damage before installation.
-
Preheat to remove moisture: Proper preheating (600–800°C for ≥30 minutes) serves two purposes: it prevents thermal shock and it drives out any moisture that may have been absorbed.

Summary: The Prevention Checklist
Most honeycomb ceramic filter problems are preventable. Run through this checklist before every pour:
| Problem | Prevention |
|---|---|
| Thermal shock cracking | Preheat to 600–800°C for ≥30 minutes; ≤10°C/min heating rate |
| Bypass flow | Seal edges with refractory paste; maintain ≤1–2 mm gap |
| Breakage | Inspect every filter; handle gently; control pour impact |
| Clogging | Match pore density to application; size filter correctly |
| Poor filtration | Match pore density to inclusion size; place close to cavity |
| Shifting | Secure filter in cavity; check before closing mold |
| Moisture damage | Store in dry environment; preheat to drive out moisture |
When properly selected, installed, and handled, honeycomb ceramic filters can remove over 90% of inclusions larger than 30μm, convert turbulent flow to laminar flow (Reynolds number below 2000), and reduce defects from porosity and voids by up to 60%. But they only deliver these results when the basics are done right.
Material properties, specific parameters, and recommended practices may vary depending on your alloy, molding process, and filter manufacturer. Always consult your filter supplier‘s technical documentation and validate procedures for your specific casting conditions.